¶ Installation
¶ Quick installation (EPFL only)
Prerequisites
- We assume that you have already Fiji/ImageJ installed locally
- Find the Plugins folder of your Fiji application and check if it contains any old
omero_ij-5.x.x-all.jarfile(s) orOMERO.imagej-5.x.xfolder(s). - Remove any such jar files or folders from the Plugins folder.
Downloads
- On Fiji, activate
PTBIOPupdate site (help -> Update... -> Manage Update Sites) - Copy locally the folder
\\sv-nas1.rcp.epfl.ch\ptbiop-raw\public\0-Software\Omero\Fiji - Copy the 2 jar files into the Plugins folder of Fiji
- Re-start Fiji
¶ Manual install
Downloads
-
Add all files in the
pluginsfolder of Fiji.
Update
- Now, restart Fiji.
All plugins already installed on BIOP computers
¶ OMERO plugin for Fiji
If you need more information on this plugin, you can have a look at the offical OMERO-Fiji documentation or contact the EPFL OMERO team.
Open an image
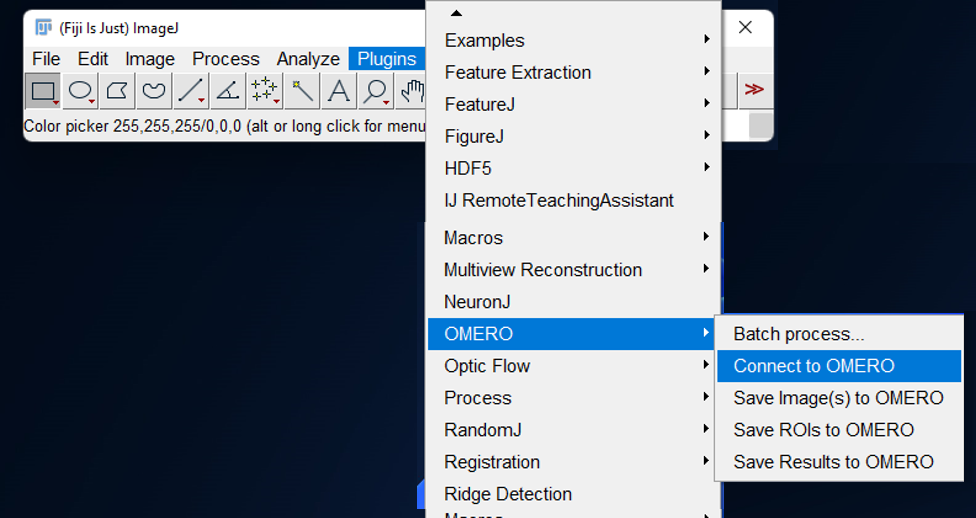
- Launch the OMERO plugin by clicking on
Plugins > OMERO > Connect to OMERO
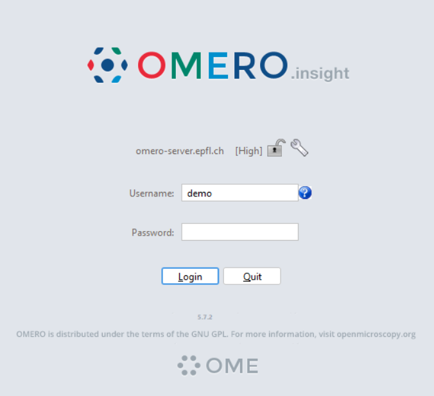
- Enter your gaspar credientials. An OMERO.insight like interface is launched.
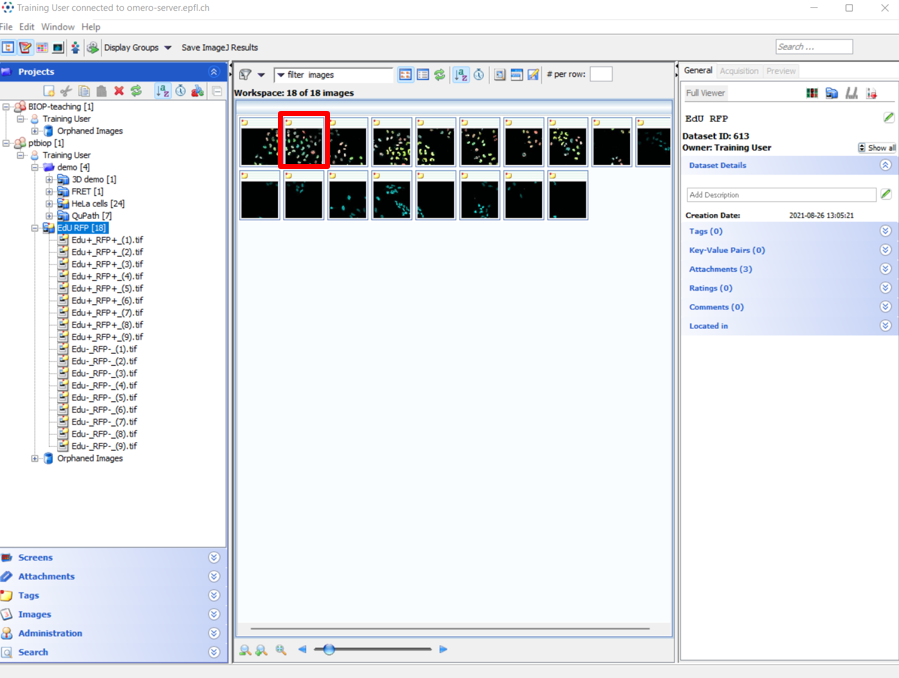
- Browse an image on OMERO and double-click on it. The image will open in Fiji.
Processing
- Do some processing on your image (using manual command or macro/groovy script)
- You can have a look to the example below.
Save results
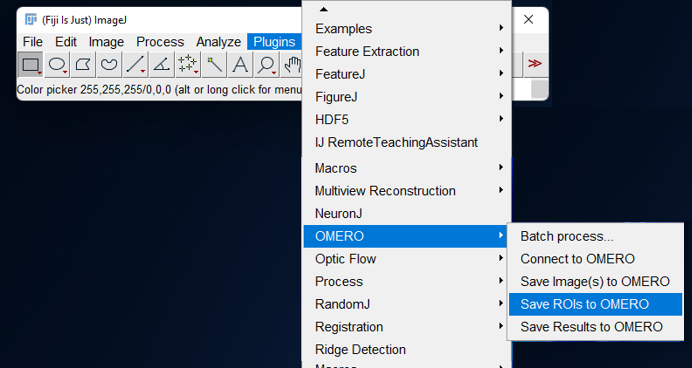
- Click on
Plugins > OMERO > Save ROIs to OMERO
- On the popup, select if you want to send ROIs or Measurements or both.
- For Measurements, enter the name under which to want to save the table.
- Click on
OK
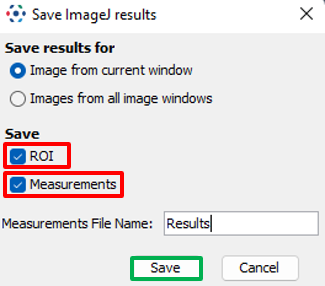
- On the next popup, click on
Nobecause the image is already coming from OMERO.
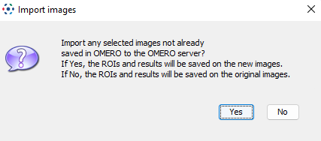
Note : All and only ROIs contained in the ROImanager of Fiji are sent to OMERO. In the same way, if you choose to also saved the measurements, all and only the ResultTable of Fiji is sent to OMERO as a .csv file.
¶ Example : Segment and analyze OMERO image manually
Let's use the Edu RFP dataset as an example
Import dataset
- If it is not already the case, import to OMERO the
Edu RFPdataset
See the Import images wiki page if you want to know how to import images on OMERO.
Step-by-step example
¶ Example : Segment and analyze OMERO image with macro
Let's use the Edu RFP dataset as an example (See the example above to know how to access it).
Step-by-step example
¶ Batch plugin
Using the omero-batch-plugin, you have the possibility to run a macro or a groovy script on a whole OMERO dataset and send results back to OMERO. It is also possible to run the macro on a local folder and import on OMERO either images and results. If you need more info, you can read the OMERO Batch Plugin GitHub Page
- Click on
Plugins > OMERO > Batch process
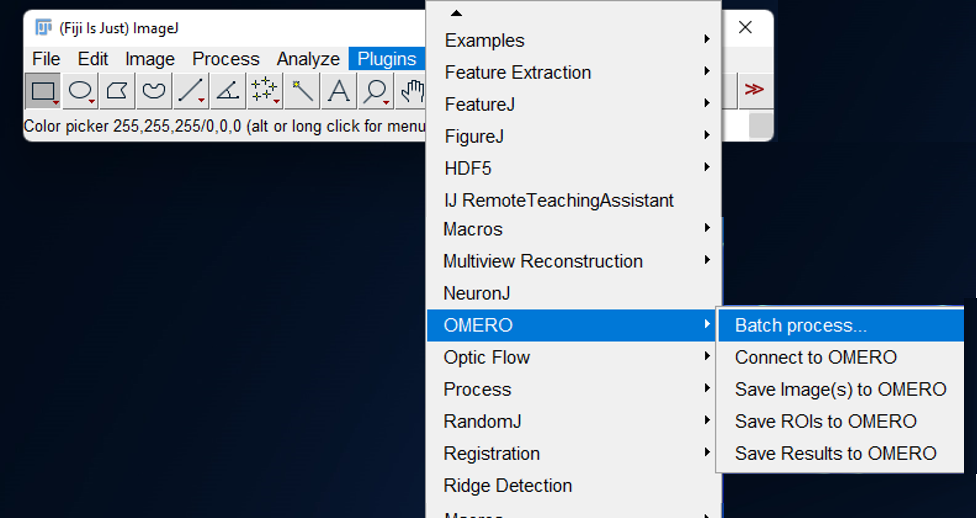
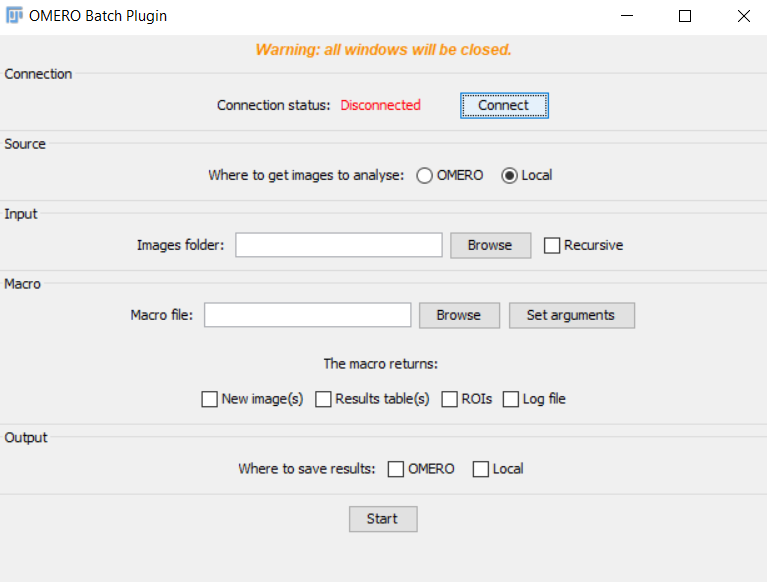
Connection panel
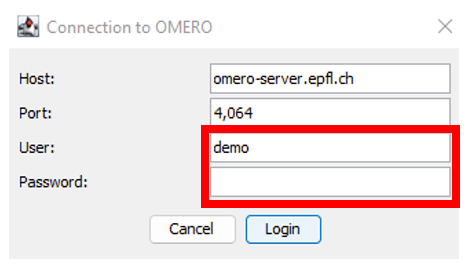
- Connect to OMERO with your gaspar credentials.
Source & input panel
OMERO
- You need to select all the info related to the dataset you want to process (group, user, project and dataset).
It is only possible to work with a dataset for OMERO input.
- You can also choose to import ROIs attached to images to Fiji or to delete current ROIs on OMERO.
The imported ROIs are stored on the ROI Manager of Fiji

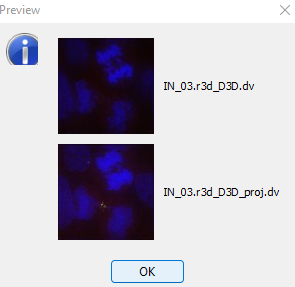
- Clicking on
previewshows you some image thumnails contained in the current dataset.
Local
- Specify the folder you want to process by clicking on the
Browsebutton

If you want to also process sub-folders contained in the main folder, tick the box
recursive.
Macro panel
Be careful : the script must NOT contain any OMERO commands !
- Select the macro file by clicking on
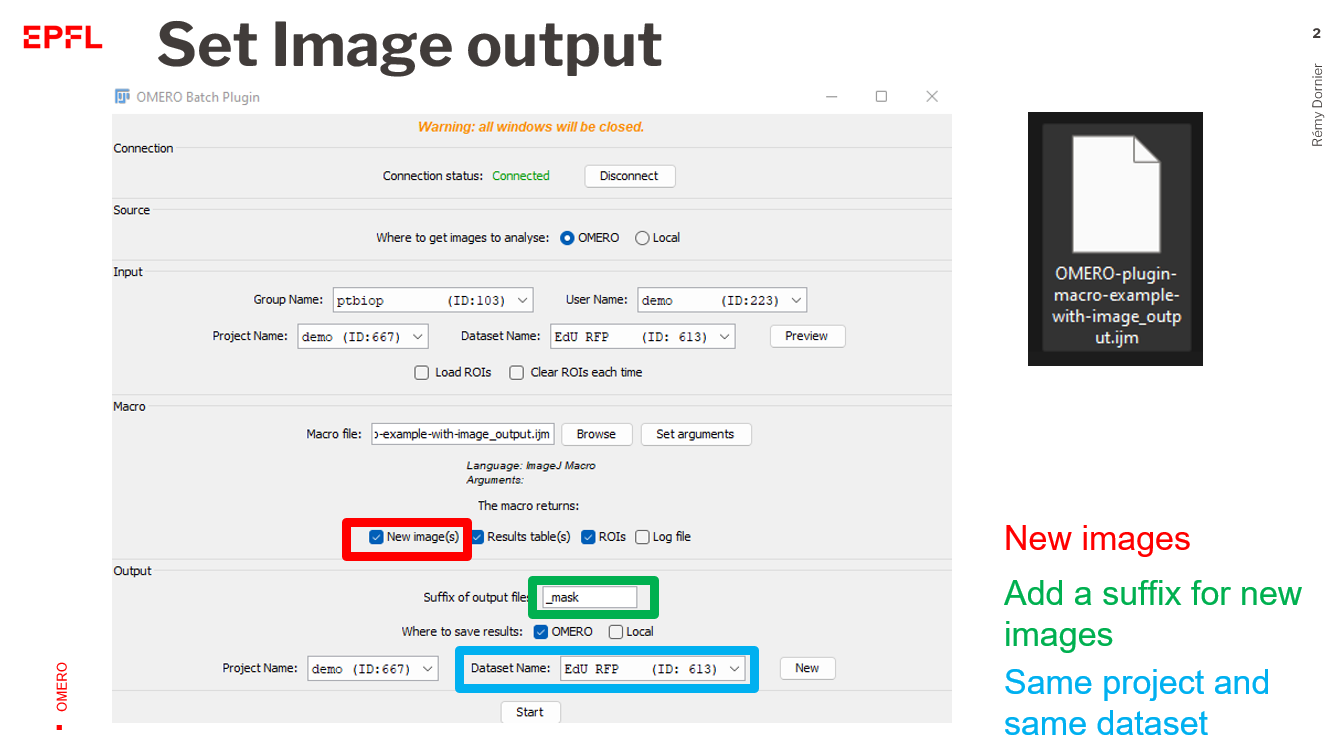
Browsebutton - Select what type of results you want to save (image, table, ROIs, log)
You need to select at least one return option
New image(s): all images that are generated and displayed that have a different name from the imported image will be saved. You need to add a name for the new images (in the next panel).Results table(s): All and only Fiji Results table will be saved as .csv files.ROIs: they should be added to the RoiManager to be saved.Log file: it refers to the log window of Fiji. It is saved as a .txt file.

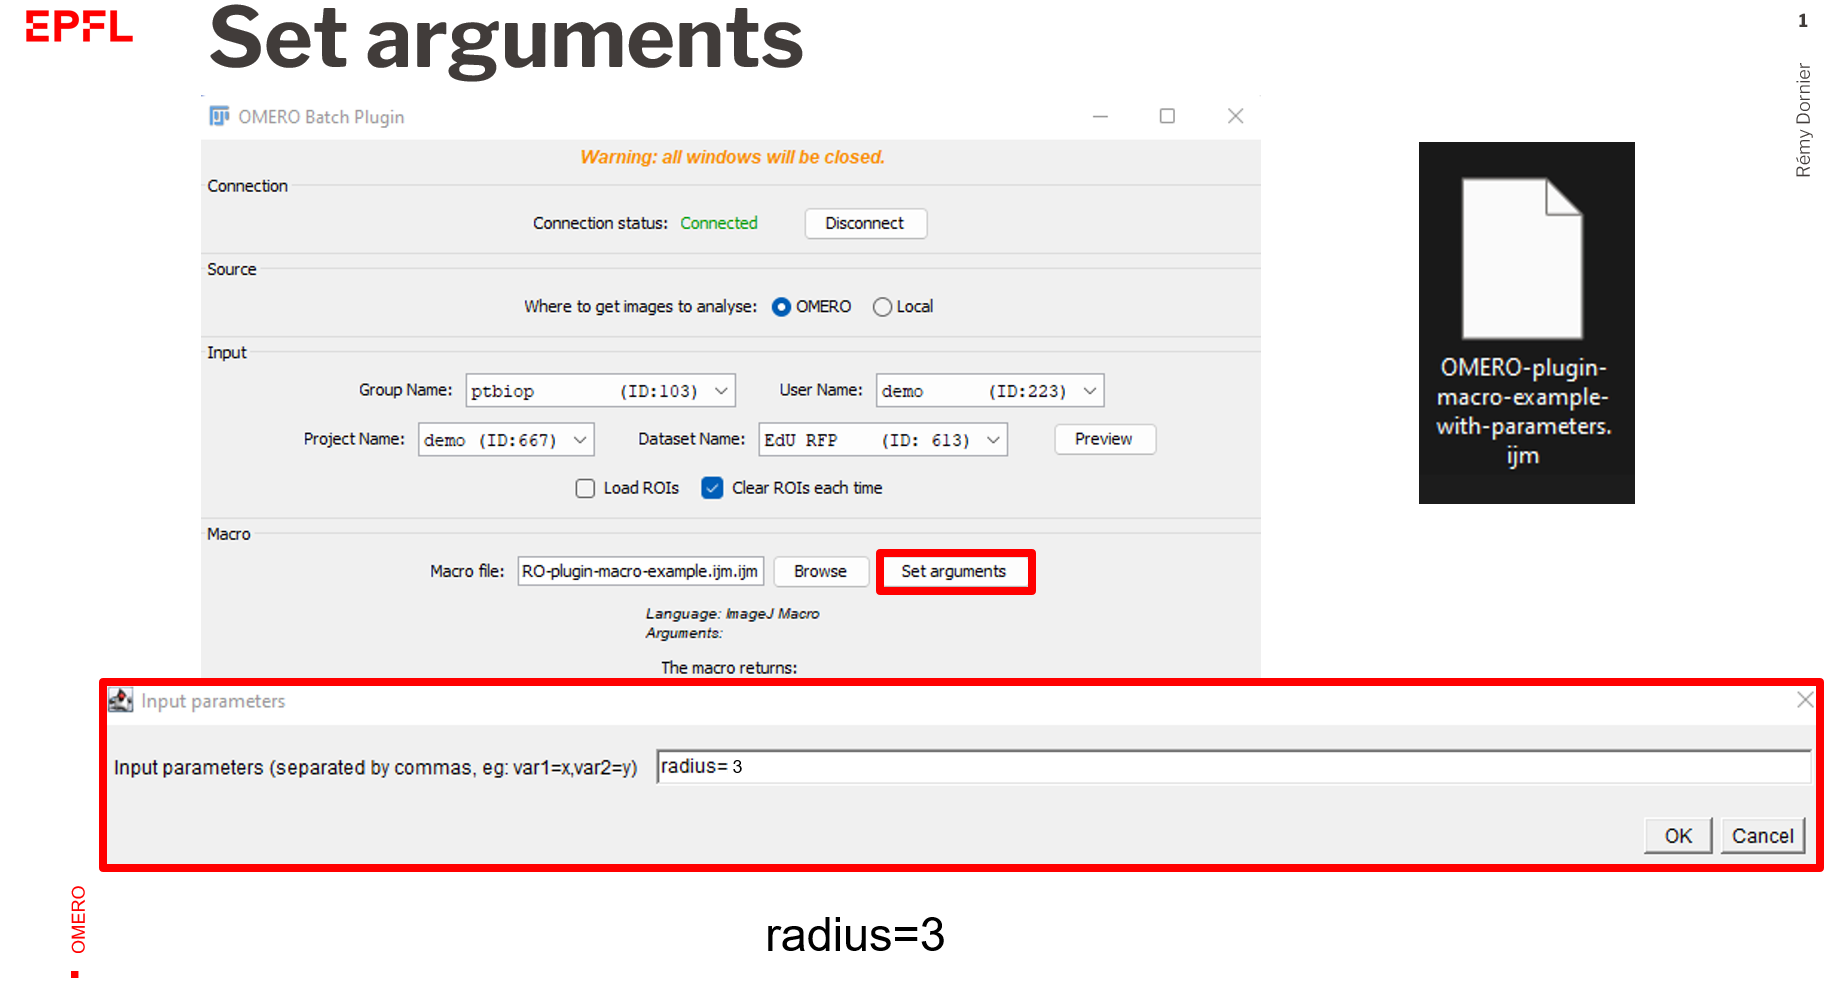
- If you need to add arguments to make the script working, click on
Set argumentsand add them comma separated.

Output panel
- Select the output storage.
- If you select
OMERO, make sure that the projectName is the same as the input project.

- If you select
local, click onBrowsebutton to find the folder where you want to save results.

-
If you have select
New image(s)in the previous panel, write the name suffix for the new images. -
Finally, click on
Start.
¶ Example : Segment and analyze OMERO dataset (1)
In this example, you will see how to analyze an OMERO dataset, using an ImageJ macro.
- No input argument
- Output results : Results table and ROIs
Ressources
Let's use the
Edu RFPdataset as an example (See the example above to know how to access it).
Macro file : omero-plugin-macro-example.ijm
Step by step example
¶ Example : Segment and analyze OMERO dataset (2)
In this example, you will see how to analyze an OMERO dataset, using an ImageJ macro.
- 1 input argument
- Output results : Results table and ROIs
Ressources
Let's use the
Edu RFPdataset as an example (See the example above to know how to access it).
Macro file : omero-plugin-macro-example-with-parameters.ijm
Step by step example
- Follow the steps of the example (1) but click on
Set arguments - Add the following inputs :
radius=2
¶ Example : Segment and analyze OMERO dataset (3)
In this example, you will see how to analyze an OMERO dataset, using an ImageJ macro.
- No input argument
- Output results : Image, Results table and ROIs
Ressources
Let's use the
Edu RFPdataset as an example (See the example above to know how to access it).
Macro file : omero-plugin-macro-example-with-image_output.ijm
Step by step example
- Follow the steps of the example (1) but also select
New Image(s)as macro returns. - In the output panel, choose the same dataset as the one used for importation
- Add a suffixe name
_mask
¶ Scripting using simple-omero-client
We are offering a bank of scripts, available on our GitHub, that implement different tasks to help you annotating your data. Those scripts are written in groovy language, and are runnable on Fiji.
Make sure that your Fiji has the right dependencies to run the scripts correctly. Have a look to the installation step above.
The scripts are ready to use.
- Download them from the github
- Open Fiji
- Drag and Drop the script into Fiji main window
- Click on Run
A popup window will always appear, asking you your credentials to connect to OMERO, and different other parameters according to what the script needs. Those parameters are listed at the beginning of each script.
For non-EPFL users, you have to change the address of the server. It is always stored in the variable
hostat the beginning of the script
The scripts are intended to be as generic as possible and, for this reason, they may not fit exactly with your needs. In such case, do not hesitate to contact us ; we can adapt every script to what you need (service only available for EPFL students/collaborators).
If you need any help or more information, contact the EPFL OMERO team.
¶ Writing scripts in Java/groovy using simple-omero-client
The available scripts make the use of simple-omero-client API, which we recommend to use for the communication with an OMERO server in groovy scripts.
If you plan to create your own scripts to communicate with OMERO, first, check our BIOP OMERO-Scripts GitHub page to be sure that what you want to do is not already done. If not, then we highly recommend you to contact us BEFORE scripting anything, so that we can discuss the needs and the implementation. We decline all responsability in case of failure/data loss if the scripts you've created haven't been valided by the EPFL OMERO team
¶ Example : Segment and analyze OMERO dataset with scripts
Resources
Let's use the
Edu RFPdataset as an example (See the example above to know how to access it).
Groovy script DL_Image_Process_for_HeLa for running an analysis pipeline on a whole OMERO dataset using Fiji
Groovy script DL_Image_Group_Image_Tables_To_Dataset_Table to generate an OMERO table from analysis results
Step by step example
