¶ Installation
¶ Quick install (EPFL users only)
- Copy locally the folder
\\sv-nas1.rcp.epfl.ch\ptbiop-raw\public\0-Software\QuPath\QuPath_Common_Data_0.4 - Replace your folder
C:\QuPath_Common_Data_0.4by the copied folder. - Re-start QuPath
BIOP computers
- SV-01-026 Mantis Shrimp
- SV-01-096 Peacock Spider
- SV-01-159 Fluorescent Platypus
- SV-01-002 Bird Of Paradise
¶ Manual install
¶ Prerequisites
- You should already have configured your QuPath with the path to the extension folder.
- If it is not the case, please go on
Edit->Preferences. - Then, under
Extensionmenu, double-click on the text area - Browse the folder
QuPath_Common_Data_0.4(generally, it isC:\QuPath_Common_Data_0.4) - Close QuPath
¶ Downloads
- Download the latest
qupath-extension-biop-omero-x.x.x.zipfile. Please follow the installation steps - Download the latest
qupath-extension-biop-hrm-x.x.x.zipfile from releases . Unizip and copy the two jars in theextensionfolder of yourQuPath_Common_Data_0.4.
Be Careful :
qupath-extension-biop-omero-x.x.x.zip, is only compatible with QuPath v0.3.2 and above
¶ Updating an existing installation
Dowload the latest versions and restart QuPath
- Restart QuPath
¶ Sending images to HRM
¶ Prerequisites
Have an open QuPath project
Images within the QuPath project can be stored either locally or on OMERO
¶ Step by step
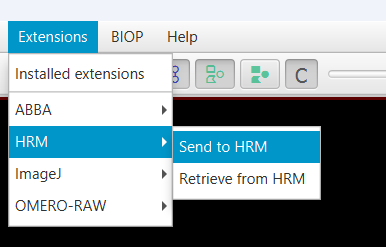
- Find the command
Extensions → HRM → Send to HRM.
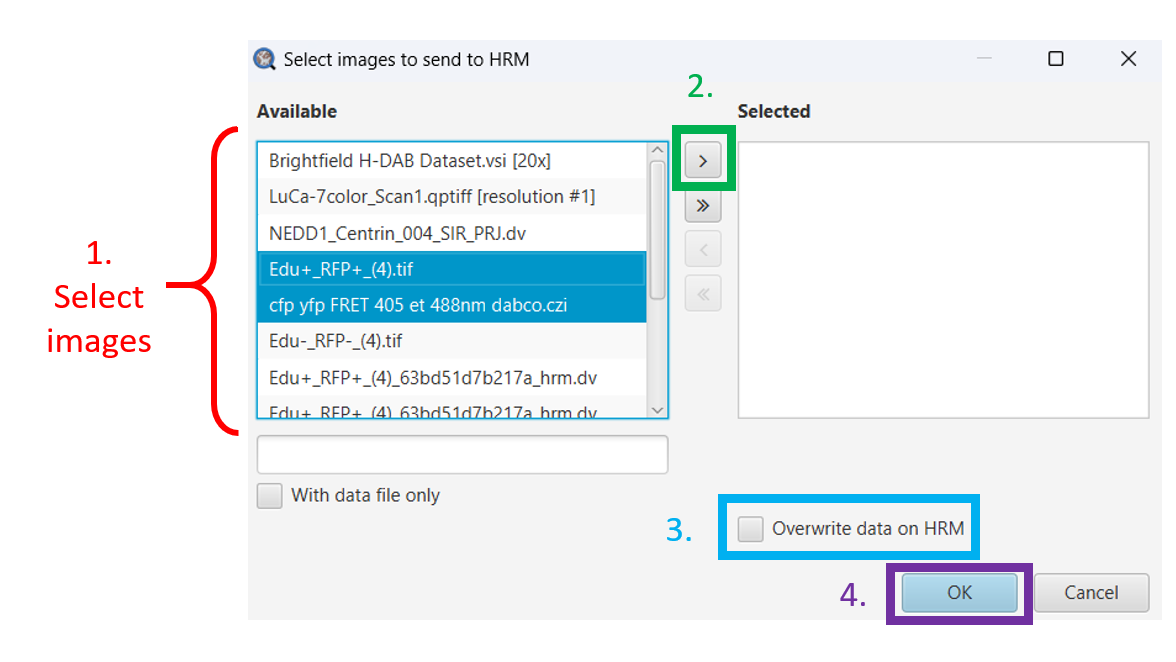
- In the popup, select all images you want to process (i.e. apply a deconvolution algorithm)
- Choose if you want to overwrite images on HRM (i.e. relpace images with the same name on HRM by newest ones).
- Click on
OK
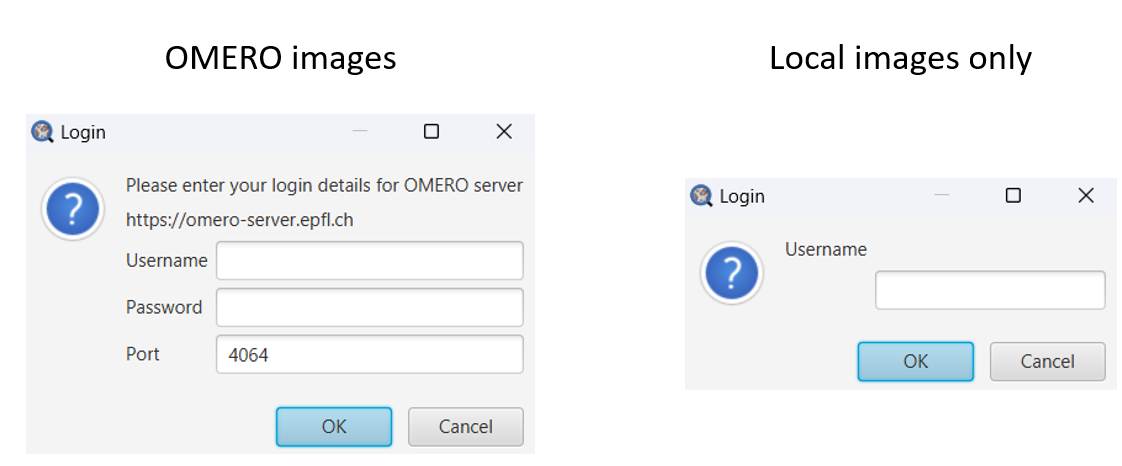
- Enter your gaspar credentials (username and password for OMERO images or just username for images stored locally) and click on
Ok.
- Locally stored images will be saved under
HRM-Share -> your_folder -> Raw -> QuPath -> local - Images sgtored on OMERO will be downloaded under
HRM-Share -> your_folder -> Raw -> QuPath -> omero -> project_name -> dataset_namefor
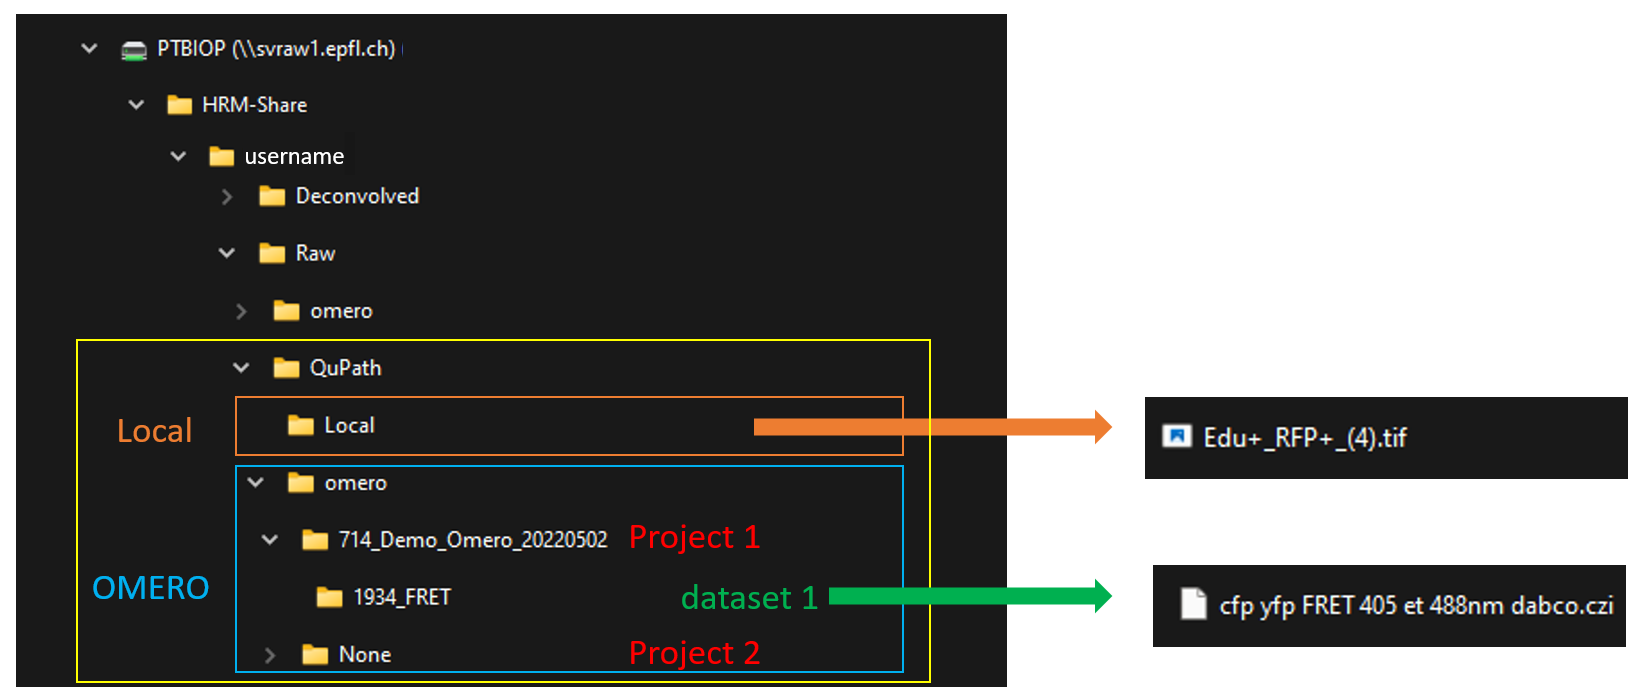
¶ Run HRM deconvolution algorithms
Instructions on how to use Hygens Remote Manager can be found on our HRM Wiki
¶ Recover images from HRM back into your QuPath project
¶ Prerequisites
You must ensure that the currently open QuPath project contains the original images you sent to HRM in the first place
¶ Step by step
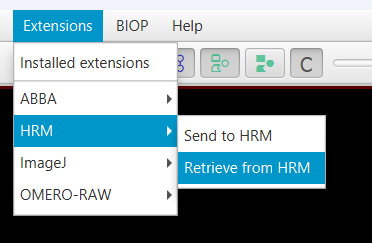
- Find the command
Extensions → HRM → Retrieve from HRM.
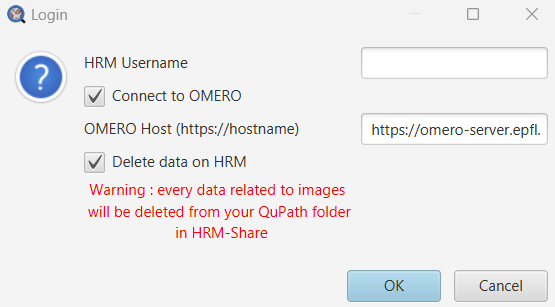
- In the popup, enter your gaspar username (to check your HRM account)
- If you have images coming from OMERO, then tick the box
Connect to OMERO - Choose if you want to delete images on HRM (i.e. delete images and attached files after when have been transferred).
- Click
OK
If you have ticked
Connect to OMERO, it will ask you your gaspar credentials
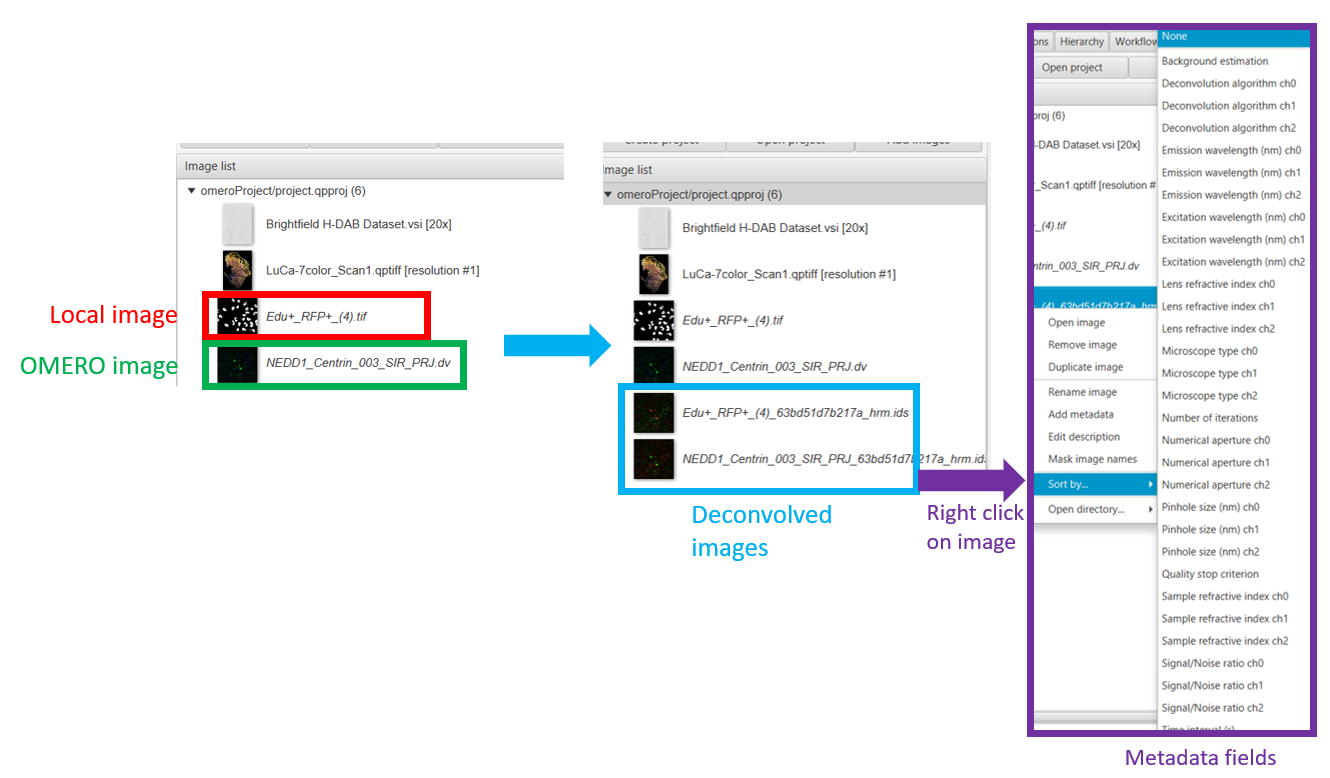
- If raw images were coming from OMERO, then deconvolved images are automatically uploaded on the same dataset on OMERO, with image and restoration parameters as key-value pairs as well as log fil as attachment.
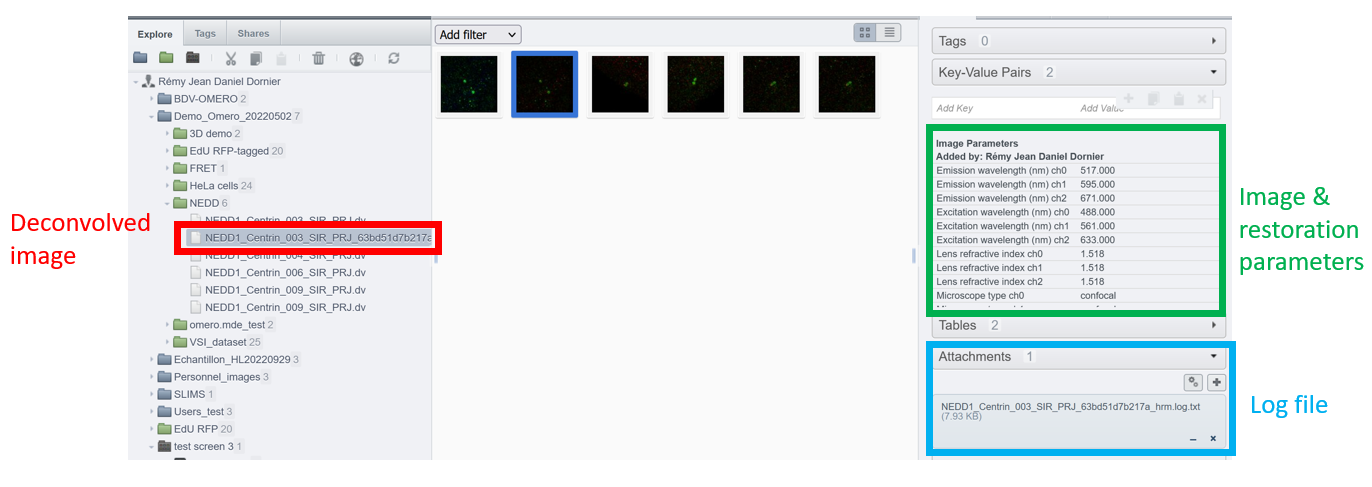
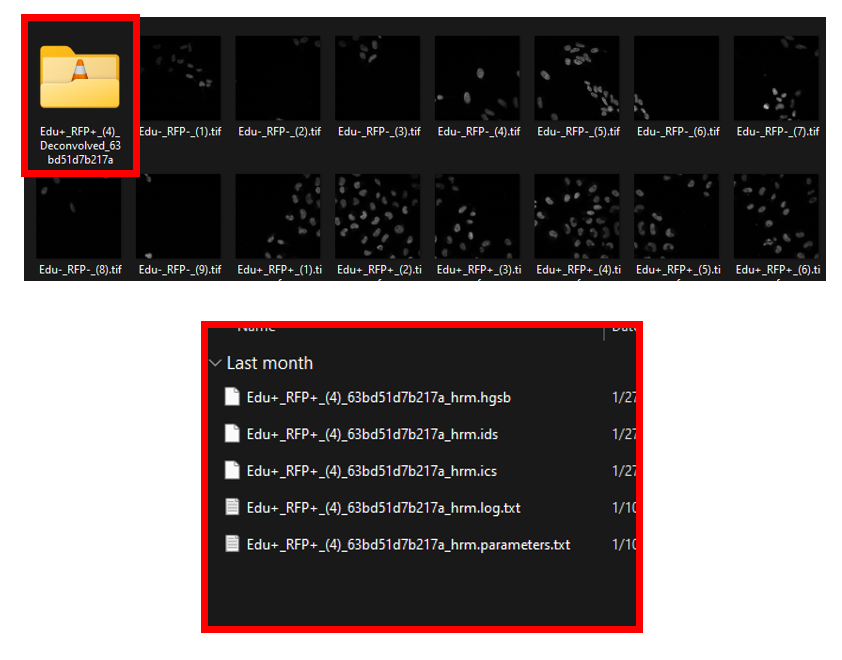
- If raw images were locally stored, then all images and attached files (log, parameters...) are copied to the parent folder of the raw image.
- For all types of raw images, deconvolved images are automatically added to your QuPath project, and image & restoration parameters are automatically added as QuPath metadata field.